How to Use Stick n Stitch Sashiko Transfer Patterns - A step-by-step instructions
If you have no clue how these transfers work…
Here’s a short video that might help. Once you’ve seen it, we’ll go through the materials, patching methods, and simple step-by-step directions to get you started.
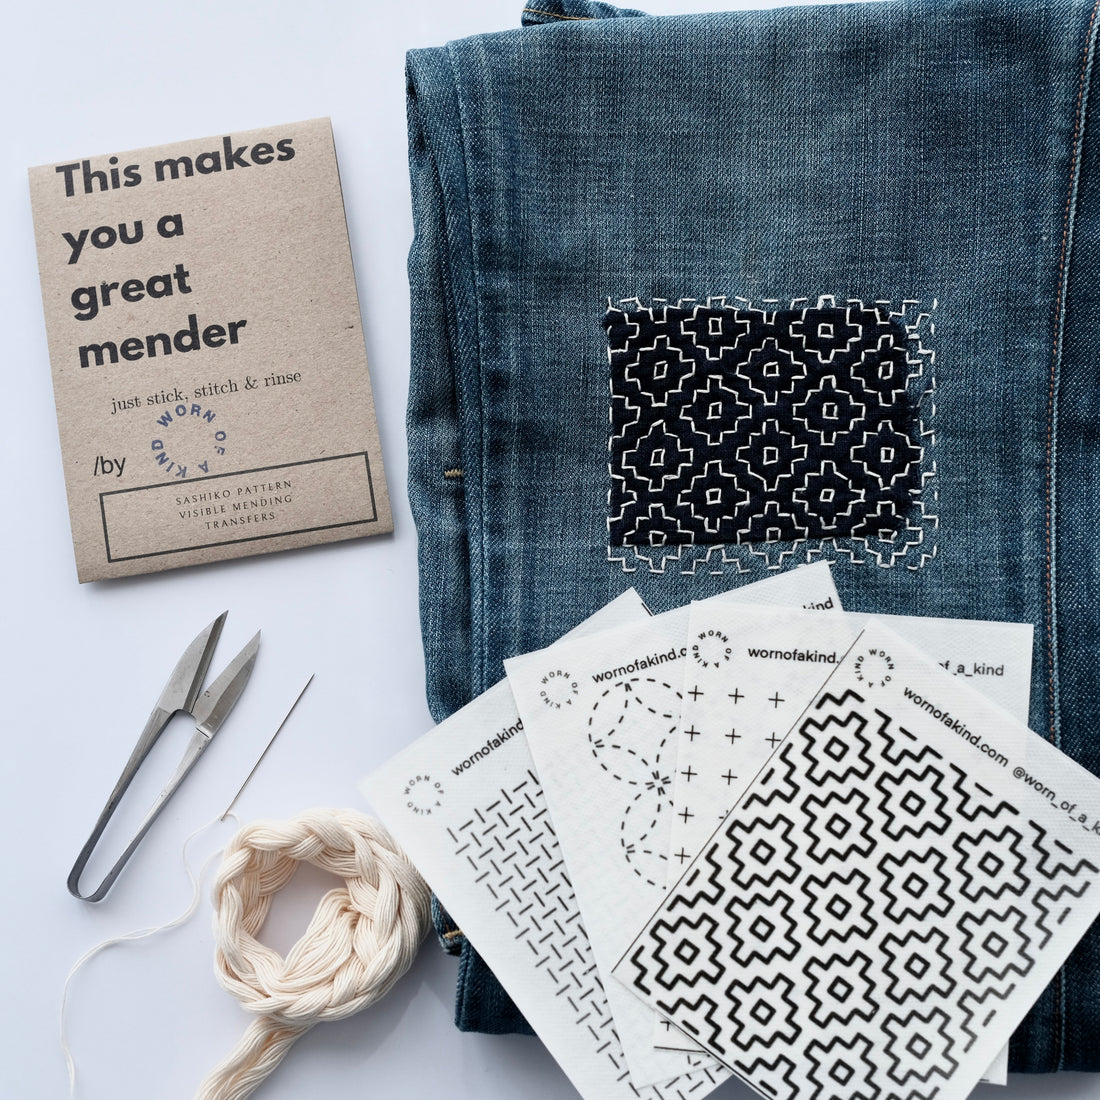
Tools and Materials
Before starting your sashiko visible mending, it’s helpful to gather the right tools and materials. Having the right supplies makes the process easier and more enjoyable. 
Thread:
Sashiko thread is recommended for its strength and durability, but you can also use embroidery thread, Perle thread, or multiple strands of sewing thread. Choose colors that complement your garment — don’t be afraid to play with color, as it can add personality and character to your mending.
Needle:
Use sashiko needles with smaller eyes for smoother stitching through multiple layers. If you don’t have sashiko needles, a sturdy, sharp needle with an eye just large enough for your thread will work. Avoid eyes that are too large, as this makes it harder to pass through the sticky transfer and fabric. It’s best to test and adjust to find the needle that feels most comfortable.
Fabric:
Test your fabric by gently poking it with a needle — it should pass through easily. Choose fabric that matches or complements the garment you’re mending. For example, elastic garments work best with elastic patch fabrics.
Thimble:
A thimble is highly recommended, especially when working with heavy fabrics or multiple layers. It protects your hand and helps push the needle through the fabric. A palm sashiko thimble provides the best control and force once you get used to the unshin technique. You can also check out this short video demonstrating the unshin technique on sticky transfers.
Scissors:
Any scissors will do, but small embroidery scissors or a thread snipper make trimming thread ends much easier. Their sharp, precise blades help keep your work neat and tidy.
You can find all these tools and materials [here].
Now that you’ve got everything ready, it helps to see the whole process at a glance before jumping into each step.
Here’s a quick overview:

Preparing the Patch
There are two ways to position a patch when mending a hole:

1. Patch on top of the hole:
Place your fabric patch over the damaged area so it fully covers the hole. Stick the transfer on top of the patch, ensuring it covers the entire patch with a little extra allowance around the edges. This extra sticky layer helps hold both the patch and garment together. For a neat finish, fold the edges of the patch inward before applying the transfer to prevent fraying.
2. Patch underneath the hole:
Position the patch on the backside of the hole, then stick the sashiko transfer over the damaged area. Make sure the design covers the entire hole. Folding the edges of the hole inward can help create a tidy mend. The transfer’s stickiness usually holds the patch in place, but you can also secure it with safety pins or a few basting stitches before applying the transfer.
Important: Wherever you place the patch, always stick the sashiko transfer on the very top layer so you can follow the pattern while stitching.
Stitching the Patterns
Now that your garment is prepared, you can follow the directions below to stitch your sashiko patterns and complete your visible mend.


 Rinse & Dry
After finishing your stitching, gently rinse your mended garment and let it dry. You’ve now given it a new lease on life! These sashiko patterns can also be used for other textile projects, such as coasters, small purses, or decorative patches.
